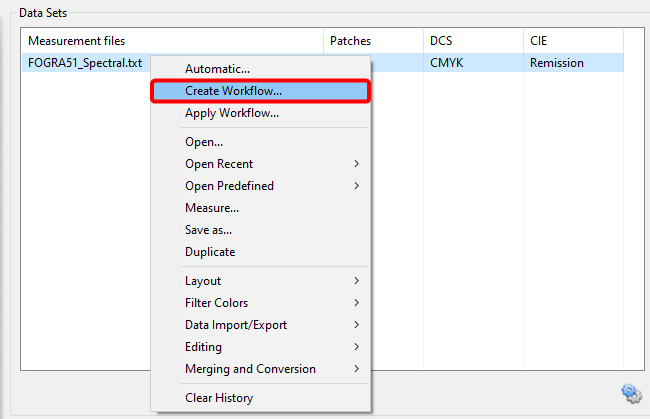
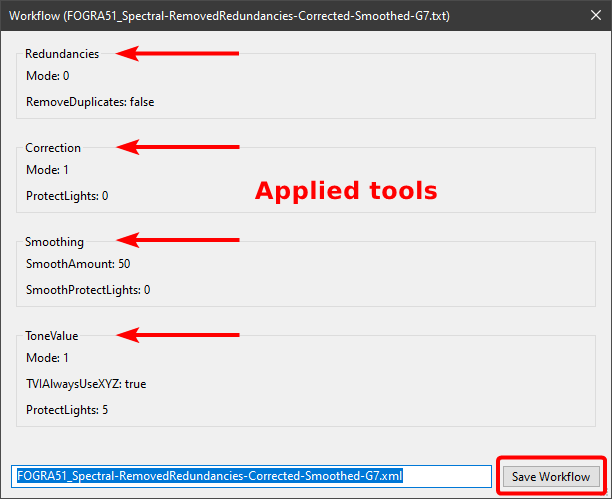
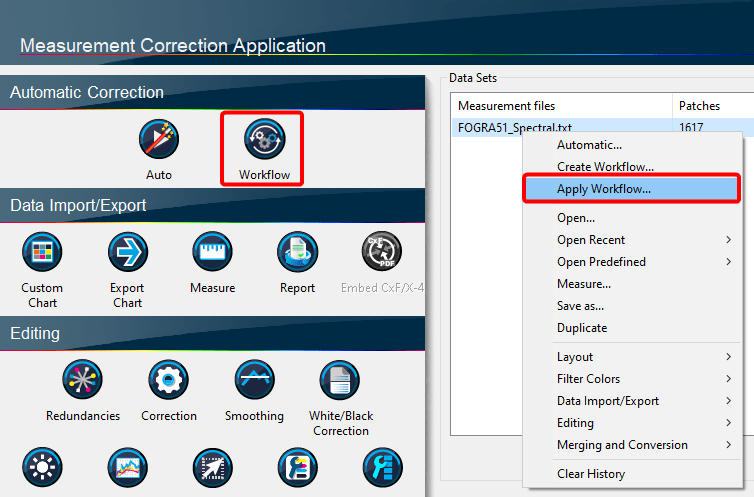
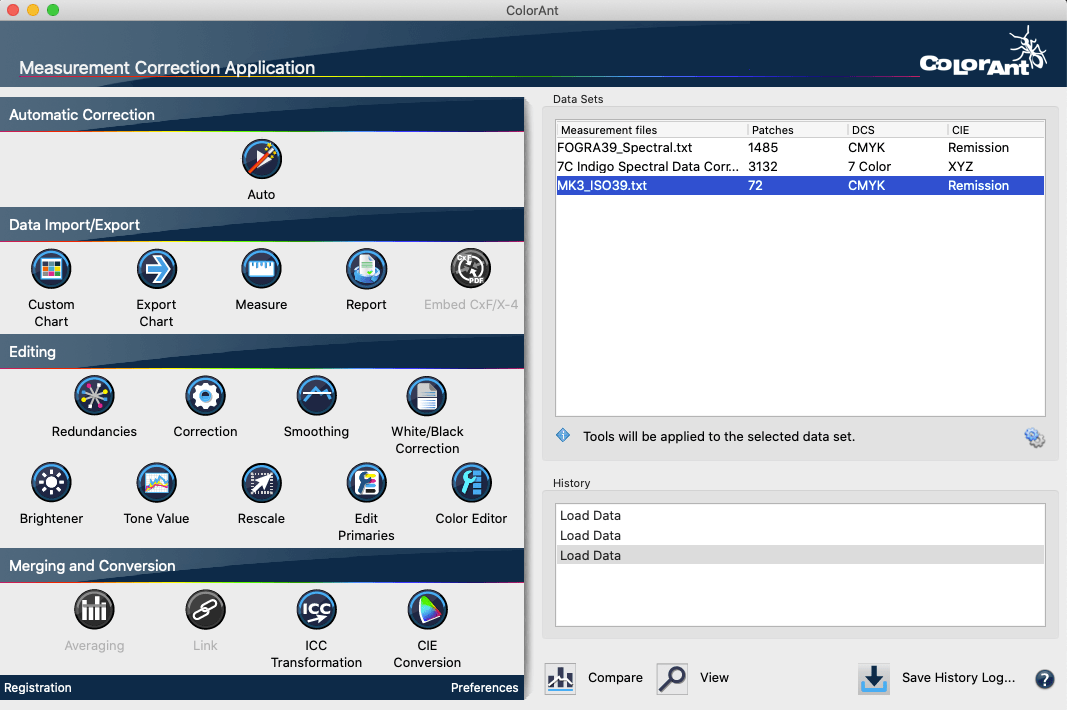
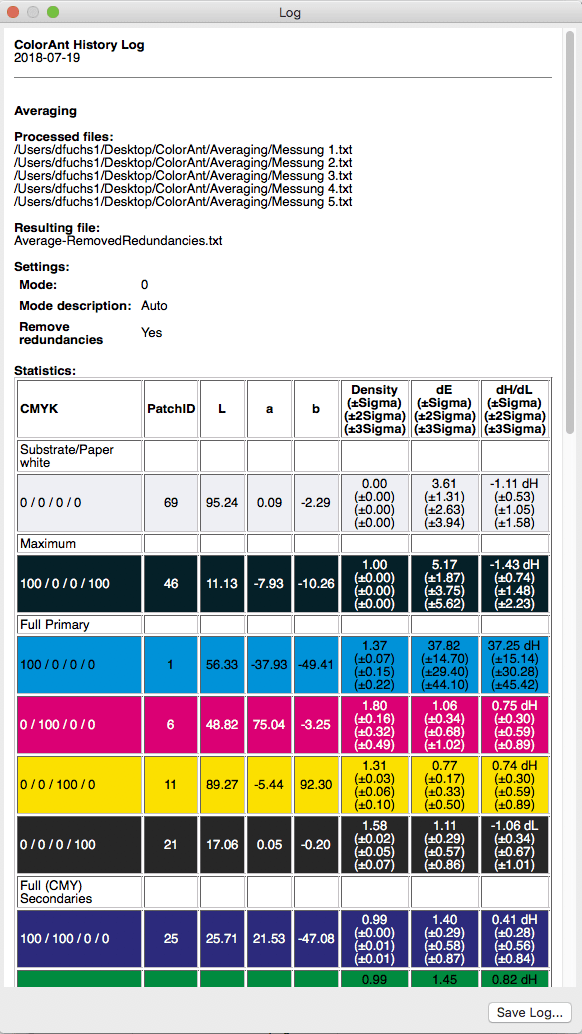
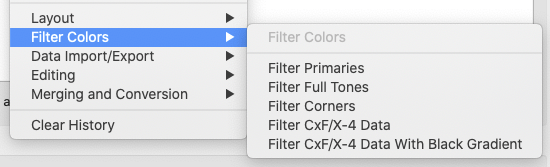
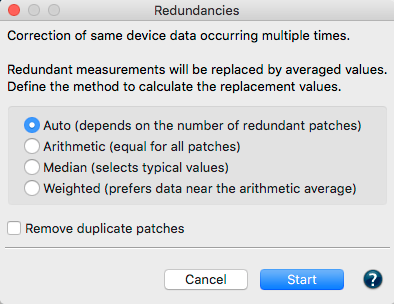
Redundancies
Corrects color patches by averaging the redundant patches and replacing with the same value.
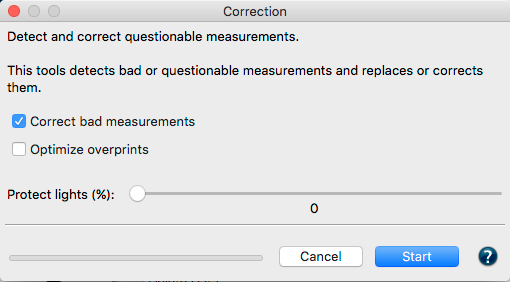
Correction
The Correction tool detects faulty measurements or inconsistent measured values and replaces the data with expected measurement values. Use the Protect Lights feature to exempt Flexo data bumps.
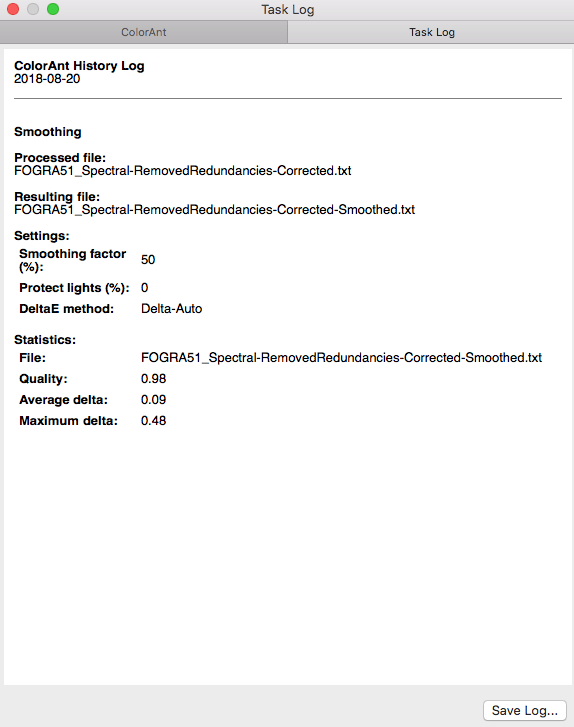
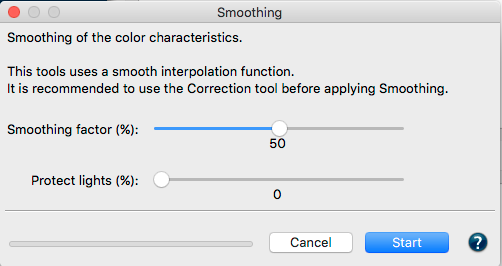
Smoothing
Corrects inhomogeneous measurement data and non-smooth curves by interpolating existing smoothed data. The Auto correction uses the maximum slider setting. Use the Protect Lights feature to exempt Flexo data bumps for being unintentionally smoothed.
White/Black Correction
Apply manual corrections to the most white and darkest color patches, typically the paper or other substrates. The White/Black Correction tool is designed to be used only on a single measurement file.
Brightener
Step one: Analysis
Brightener correction analyzes the remission curve of the paper white to ascertain whether the paper contains optical brighteners or blue-colored paper.
Step two: Correction
Correction will be applied if optical brightener has been detected. The correction can be adjusted via a slider control and at 100% setting, a similar result will be achieved as if the paper were measured with a UV cut filter.
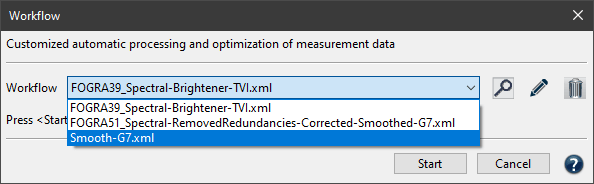
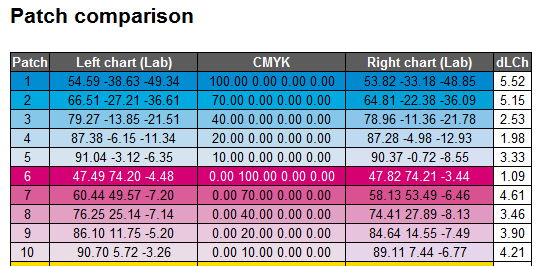
Tone Value
The Tone Value tool corrects measurement data to a specific set of curves. Data is corrected with a "what if" the data was printed to (e.g. G7, ISO 20654 SCTV) specific conditions.
The Protect Lights slider can be adjusted to accommodate the highlights of flexo data.
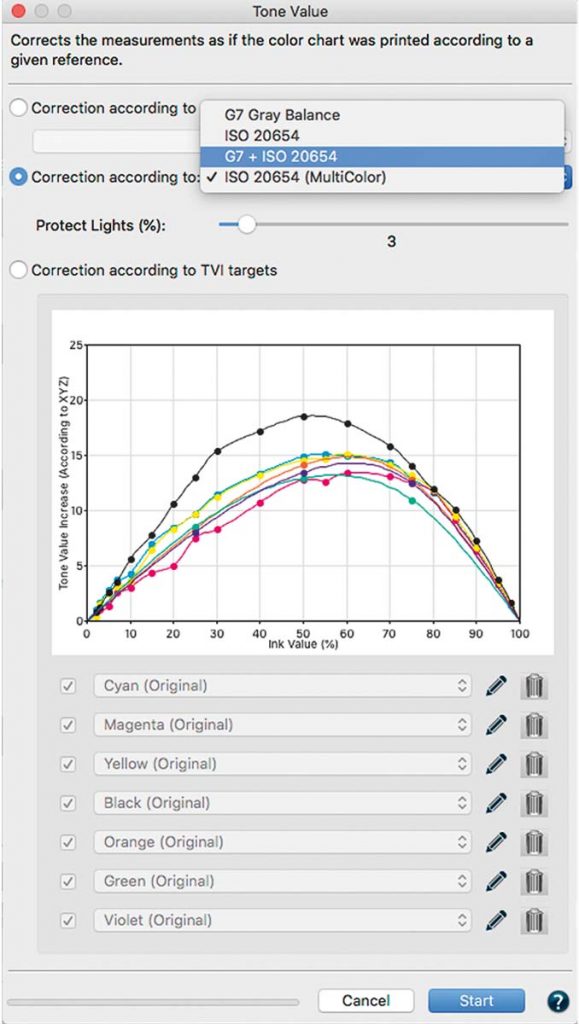
Tone Value Dialog
Three options are available:
Correct according to a given profile:
Specify a profile and measured values are adjusted to achieve the same tone value increase curves as those with the standard profile that was chosen.
Correction according to:
Tone value curves are calculated to match the requirements of G7 Gray Balance, ISO 20654 (SCTV), G7 and ISO 20654 (SCTV) or ISO 20654 (SCTV) multicolor.
Correction according to TVI targets
Manual editing of each channel allows the user to predefine the tone value increases that should be incorporated in the measurement data.
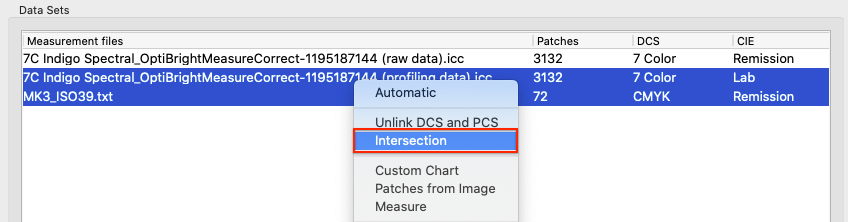
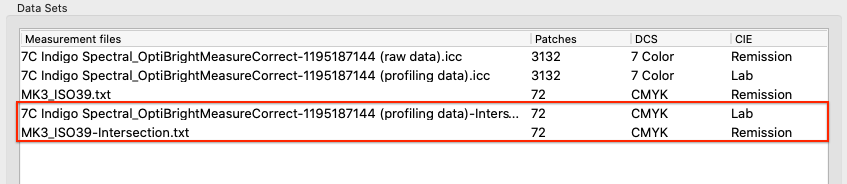
Rescale
ColorAnt can calculate large test charts that can be used for profiling from small chart measurement files. Some printing processes, (e.g. flexo printing on uneven materials) pose challenges to an artifact-free printing ECI2002 test chart. An effective approach to measuring large charts would be to place several small test charts, e.g. ColorLogic Profile Updating strips on one page, measuring the test strips and, averaging them in ColorAnt and then scaling up to a large ECI2002 test chart with the Rescale tool.
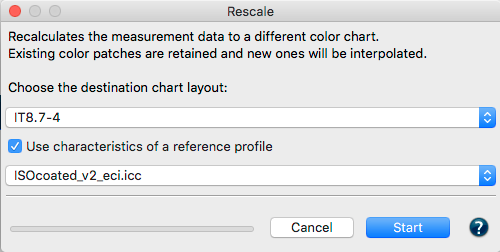
Rescale a chart
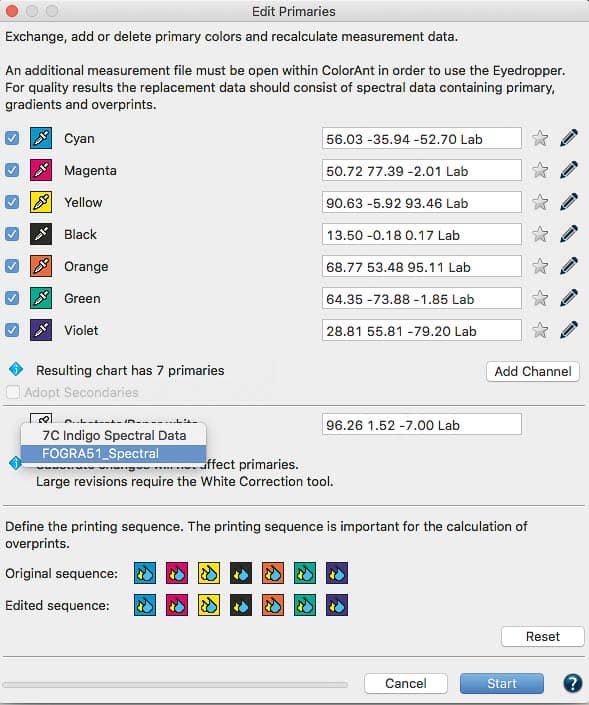
Edit Primaries
The Edit Primaries tool (Fig 5.3) allows users to add, remove, and exchange primaries or the paper/substrate in an existing measurement data. In typical print production, adding or swapping ink(s) requires the expense of printing a complete, full size test chart. The Edit Primaries tool simply requires the spectral data of the new ink(s) to be added or exchanged. Edit Primaries not only exchanges inks but also recalculates all overprints based on intelligent spectral color models. One of the major features of the Edit Primary tool is the ability to dynamically choose the best patches from the data provided. The more complete the data that is provided to the Edit Primaries tool (spectral data is preferred) the more accurate the results. Items that will improve are: the exchange of gradations of the primary color, overprint information, e.g the primary combined with black. If the data that was chosen contains overprints, such as secondary colors, the Adapt Secondaries feature will take the additional data into account.
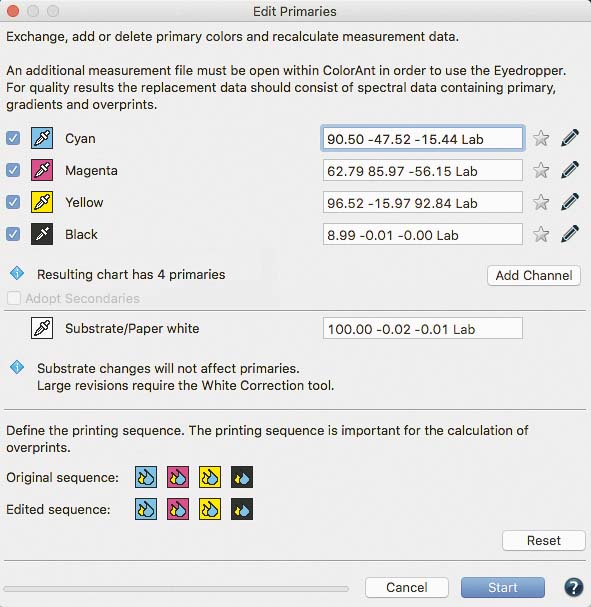
Scenarios for potential efficiency gain with the Edit Primaries tool in production :
Modify channel names: Reorder channel names without modifying data
Variance in press condition: The characterization press run is slightly deficient in solid ink density or hue on one or more colors.
Exchange of paper/substrate: The inks are the same but a slightly different paper shall be used.
Exchanging inks in a print packaging production environment:
Create a new profile that swaps in e.g. Blue for a Cyan or a Rhodamine Red for Magenta.
Adjusting the print sequence: Allows improved overprint calculations.
Flexibility for the packaging manufacturer: Create different color variants from a full size 7 color press characterization data set by deleting channels to building new characterization data sets without printing a new test chart. For example, from an original 7C data set (e.g. CMYK+Orange+Green+Violet) build variants for CMYK only, CMY+Violet, CMYK+Orange+Green or other combinations. The production facility would need to ensure the press is stable and depending on the color needs of the job(s), and print select the profile with the least amount of channels.
Increasing CMYK gamut: Adding a 5th, 6th or 7th color to the CMYK printing process.
Using Edit Primaries
ColorLogic's suggested workflow: Load another data set with the measured new primaries, gradations of the primaries and overprint information.
Select the measurement data of a test chart measurement file for editing and click Edit Primary.
Exchanging a primary: Click on the eyedropper icon of the color to be exchanged. Select the new primary from another data set loaded in ColorAnt. Click on the channel to be imported to the primary. The screenshot shown (Fig 5.4) with a new Cyan ink that is slightly different. Selecting ink from other channels is also possible.
Click OK and the data set will be modified.
Important: Using Lab values will not produce the highest quality results. ColorLogic recommends using spectral data. When a data set is present, enter a new Lab value for the selected color or select another channel from the same measurement data set to change the printing order.
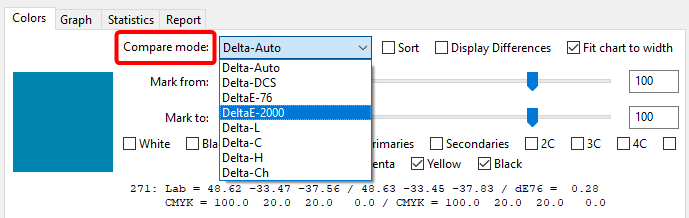
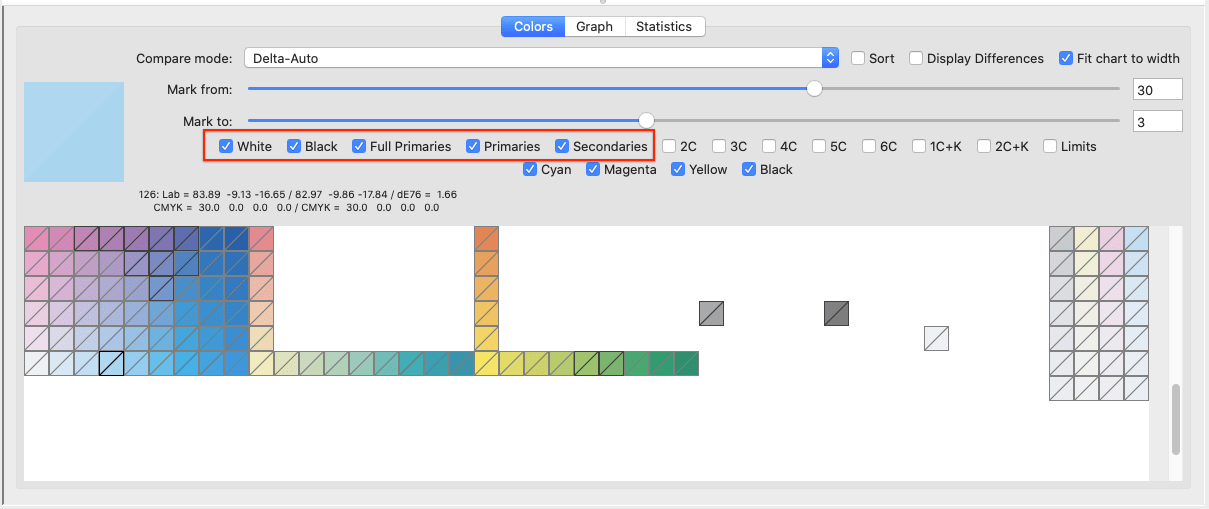
To check the exchange of primaries, use the Compare tool to verify the data.
Exchange paper/substrate
Load the test chart measurement data and load the secondary file containing information of the measured paper white into ColorAnt.
Select the measurement data of a test chart for editing and click Edit Primaries.
Click on the eyedropper icon of the Substrate/White and select the new paper white from another data set loaded in ColorAnt (Fig 5.5) Click on the name of the data set to import the data. The second option is to manually enter the new Lab values in the text field.
Click OK and the data set will be modified.
For large differences in substrates, use the White/Black correction tool.
Adding channels
Load the test chart measurement data and load the secondary information with the measured primaries, gradation and overprint information into ColorAnt.
Select the measurement data of a test chart for editing and click Edit Primaries.
Quick Start Procedure
Step one: Click on Add Channel. A new channel with default gray Lab values and the channel name Auto is added.
Step two: Click on the eyedropper icon of the new channel and select the new primary from another data set loaded in ColorAnt. Click on the channel to import the data.
The screenshot shows an example where a 5th Orange color (Fig 5.6)has been added to an original CMYK data set.
To rename the channel click on the pencil icon and enter the new channel name.
Step three: Click OK to generate the new data set.
To view the new data set, use the View tool and select the tabs 2D, 3D, SpiderWeb, TVI to verify all colors including overprints have been added. Additional edits can be made to the curves using the Tone value tool.
Removing channels
Load and select the measurement data of a test chart and click Edit Primary.
Disable the check boxes in front of the channels that need to be deleted and click OK.
The new data set will be reduced to the channels that were selected.
Color Editor
Used to edit color patches and to process color conversions of spot colors.
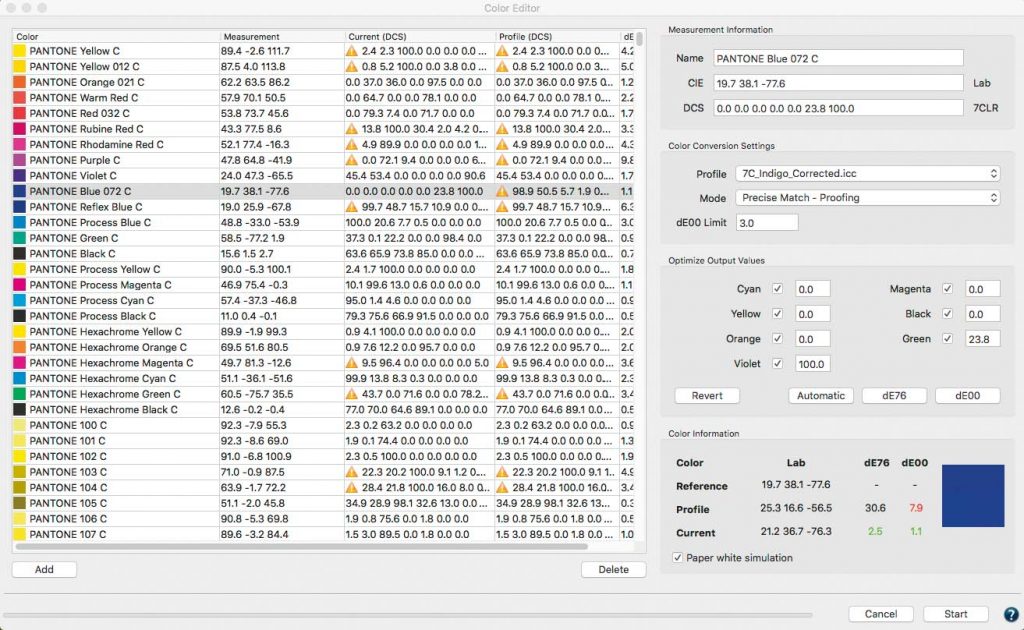
Quick Start Procedure
Color Editor allows the user to:
Edit patch names, (Fig 5.7) Lab values or device color values (DCS).
Convert and optimize a complete spot color library to a target profile for RGB, CMYK or Multicolor.
To convert spot colors to a desired target profile, first load the spot colors into the ColorAnt Data Sets section, e.g. a Pantone spot color library (or any supported file format such as CxF), then click on Color Editor. The window contains a table on the left showing all spot colors of the file and the editing options on the right. Select an ICC Profile from the drop down list and a calculation Mode.
Three modes are available:
Precise Match - Proofing
Visual Match - Utilize More Channels
Use the Least Amount of Channels
The preset dE Limit highlights colors that exceed the defined threshold. If a color is selected from the table, the device color values for each channel of the selected profile are shown under Optimize Destination Values. As a default, the device values calculated via the ICC profile are shown without any optimization.
By clicking on dE76 or dE00 the deltaE can be minimized (Fig 5.8) for each color.
Clicking on Automatic applies the selected calculation Mode which typically results in a reduced amount of channels for better print-ability. Users can optimize each individual color and can even enter device values manually.
By clicking on Start, the entire list of colors is generated in the Data Sets section including the calculated and possibly optimized device color values. The values can be saved for further usage in other applications in any format supported by ColorAnt (CGATS TXT and XML, CXF3, Photoshop ASE and ACO, named color ICC profile or GMG CSC).