Editing and Measuring Spot Colors
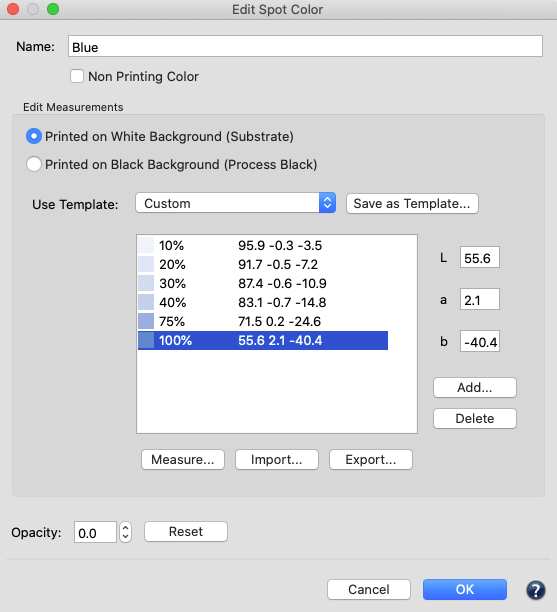
- Individual new spot colors may be entered as solid tones or gradations via the New button under Spot Colors from selected Libraries and the Edit Spot Color dialog will open. Spot colors as CxF/X-4 data are fully supported.
- Name: Enter the name of the spot color. The name should be written as in the PDF document since it is used as an identifier and therefore crucial for a successful automatic conversion.
Note: If separate libraries are created for different substrates or printing processes, identical spot color names can occur in several libraries but will be associated with different measurements. Make sure to select the correct library for the color conversion in the configuration to avoid problems.

Editing a Spot Color
- Use the checkbox Non Printing Color to define whether the indicated name of the spot color corresponds to a non-printing color (die-cutting marks, braille, coatings, etc.). Activating Non Printing Color will make the necessary settings automatically. Close by clicking on OK.
Note: In modern PDF files non printing areas can also be defined bywith processing steps. Read the explanation about PDF Layers for more information. - Printed on White Background (Substrate) and Printed on Black Background (Process Black): If the spot color is available as print on white or black backgrounds, enter it by manually measuring or by importing measured values for further processing.
- Use Template: To process a ‘true’ spot color, indicate the Solid Tone for the 100% value of the spot color. For complete tints, select a template with either three steps (3 patches: 0%, 50% and 100%) or with eleven steps (11 patches in 10% increments). Alternatively, Import a spot color that has already been measured and is available as measurement file.
- Custom: If a printed wedge with tints of the spot color does not correspond to either of the predefined templates, click Add to open the Additional Tone Values which allows to enter gradations of the wedge as percentage values. Seperate the percentage values by spaces and confirm with OK.
- The personal wedge is marked as Custom and can be saved for later use with Save as Template.
- There are three ways to define color values: Enter the Lab values for each gradation manually, select Measure to use the Measure Tool supplied with ZePrA, or select Import to load existing measurement files.
Note: It is recommended to print a wedge of the spot color directly onto the respective substrate as well as a second wedge of the spot color as an overprint with the black process color (black must be printed first) using the correct printing conditions and to measure them spectrally in ZePrA. This will allow ZePrA to perform high quality conversions for the solid tones, the gradations and the opacity, taking dot gain into account. Compared to Lab values, spectral measurement data can improve the simulation of overprinting spot colors.
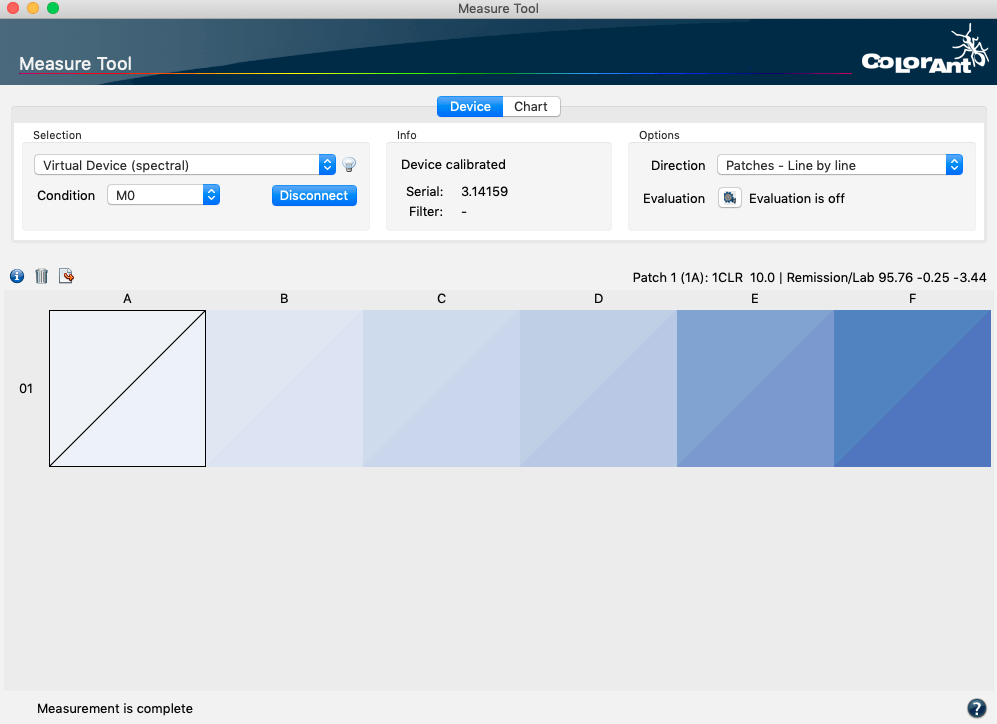
- Click on Measure to open the Measure Tool. For further information read Measuring Spot Colors with the Measure Tool below.
- Once the measuring is complete, the measurement can be transmitted to ZePrA by clicking the Transmit button. This will close the Measure Tool and the Edit Spot Color dialog reappears. Click OK to add the measured spot color to the color library.
Opacity indicates how translucent or opaque a color is. A spot color is fully transparent when the value is set to 0% and completely opaque with a value of 100%. When the opacity value is changed manually, the spot color has a custom opacity.
Reset: Removes the custom opacity from the spot color. The Reset button is enabled if the spot color has a custom opacity, otherwise it is disabled. If the spot color has no custom opacity (Reset button disabled), the displayed opacity value is updated whenever a relevant measurement value (e.g. measurement on black) changes.
Note: ZePrA will automatically calculate the opacity of measured values on black backgrounds, and use the opacity values for the color conversion of spot colors. Information from the ink manufacturer regarding the opacity of the spot color can be entered directly as a percentage, measurements on a black background are not required. Without any opacity information ZePrA will assume the spot color to be fully transparent at 0%.
Note: The Information table under Spot Colors from selected Libraries indicates whether a spot color in the library consists of a solid tone or of tints and whether the color values are based on spectral or Lab data. The opacity of the spot colors is shown as well, if available. Color values can be edited by double clicking on a spot color in the table. Delete, Cut, Copy and Paste are accessible using the right click context menu. Colors can be moved to another library by Cut and Paste. To do so, select the color(s) to be moved, right click and either Cut or Copy. Then select another Library, so that its colors appear in the table under Spot Colors from selected Libraries, right click and Paste.
Measuring Spot Colors with the Measure Tool
Some measuring instruments allow to select the measuring mode (M0, M1 or M2). Select the mode that fits the measuring requirements, then select the measuring mode for the wedge layout and press the Measure button on the instrument.
Note: Barbieri measuring instruments are optimized for test chart measurement therefore single patch measurement is not available.
Once the measurement is complete, the measured color appears in the Measure Tool. The measurement data can now be transmitted to ZePrA by clicking Transmit. Saving the measured values in the Measure Tool is not required.
The Measure Tool is part of ColorAnt and included in ZePrA. If it has not been installed on the computer, the Measure button is not available in ZePrA.
The following measuring instruments are supported by the Measure Tool:
- Barbieri Spectro LFP
- Barbieri Spectro LFP qb
- Barbieri SpectroPad
- Konica Minolta FD-7
- Konica Minolta FD-9
- Techkon SpectroDens (Windows only)
- Techkon SpectroPad (Windows only)
- X-Rite eXact
- X-Rite i1iO
- X-Rite i1Pro 1 (without XRGA)
- X-Rite i1Pro 2 (XRGA)
Procedure
Connect the measuring instrument to the USB port of the computer and select the appropriate wedge from the drop-down menu Use Template. Then click the Measure button in the Edit Spot Colors window in ZePrA. The Measure Tool will start and the rest of the process is completed within the Measure Tool software.
If a solid tone is selected, a single color patch is preselected for the measurement. If a step wedge is selected, the layout of the wedge selected in ZePrA is displayed. Under Selection, select the measuring instrument connected to the USB port from the drop-down menu. Click Connect and follow the instructions. More information about measuring can be found in the ColorAnt online help.
In single patch measurement, only one color is measured and transmitted at a time. Either click Transmit or re-measure if the measurement was faulty or unsuccessful.

The Measure Tool Window

