ColorAnt | Smoothing

Smoothing Measurement Data
Common measurement data issues:
- Inconsistent or illogical gradation values for lighter or darker tones compared to adjacent colors.
- Irregular data caused by variations in the printing process or contamination of color patches during measurement (e.g., mechanical interference from the device).
- Incorrect color readings, such as a green patch being recorded instead of a red value.
Smoothing and/or Correcting Measurement Data
The Smoothing tool corrects inhomogeneous measurement data and bumpy curves. It uses an interpolation method that fits perfectly to already smoothed data. The amount of smoothing is set with a slider, fitting the entire measurement data into the mathematical model. Thereby, the general characteristic of the measurement data is maintained.
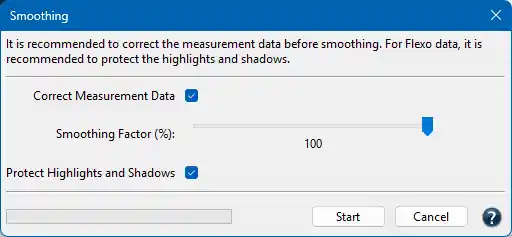
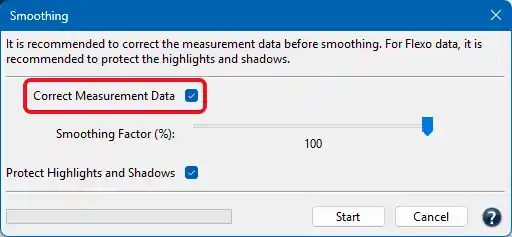
Important: It is strongly recommended to check the Correct Measurement Data checkbox before applying the Smoothing tool. Without correction, the smoothing process may transfer errors from the data to adjacent colors and may not achieve optimal results.
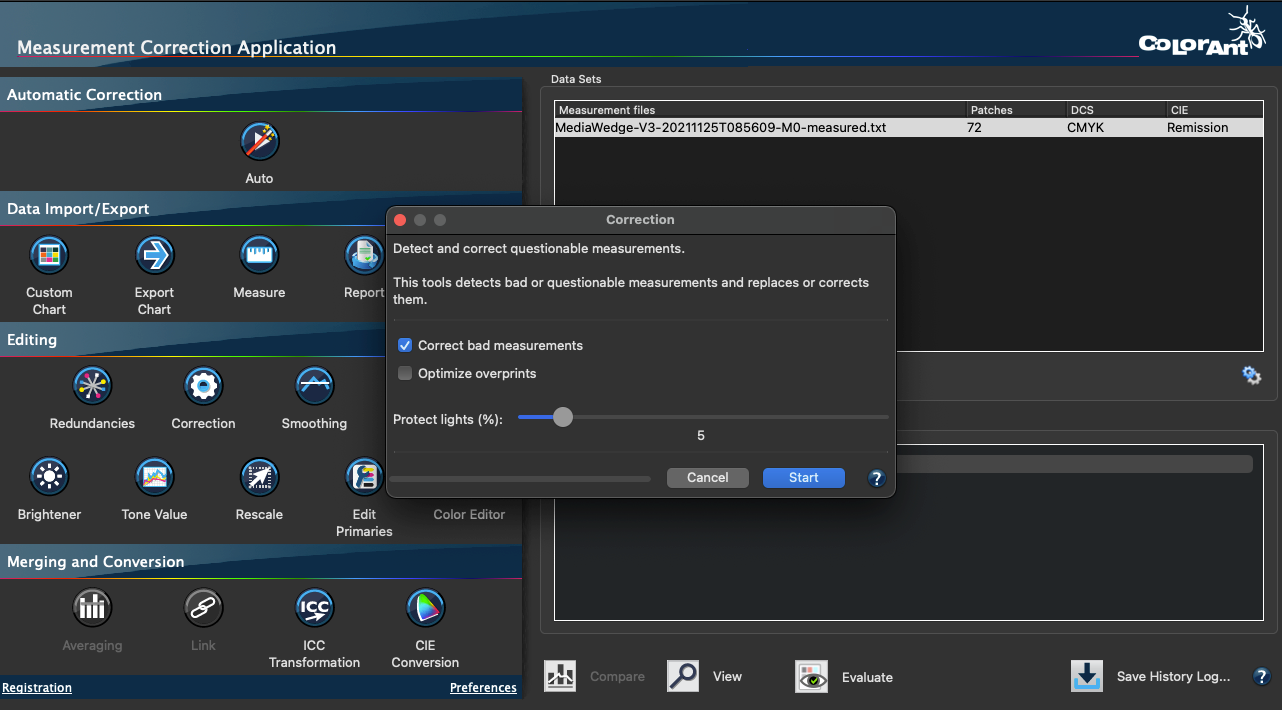
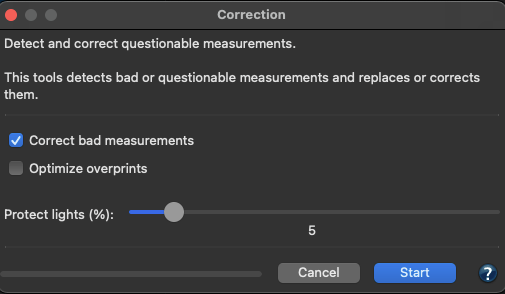
Correct Measurement Data: Detects faulty or “illogical” measured values and replaces data with proper measurement values. If the data is left uncorrected, inaccurate ICC profiles are often the result.
Note: If you only want to correct the measurement data without smoothing, set the Smoothing Factor to zero, see screenshot.
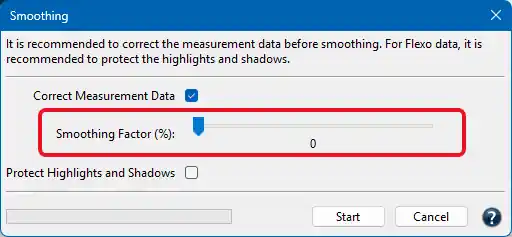
Smoothing Factor: Specifies the strength of the smoothing.
Note: When using the Automatic tool, the Smoothing factor is set to 50%.
Protect Highlights and Shadows: This feature preserves highlight and shadow areas by handling them separately and maintaining their characteristics during the smoothing process. This is useful for maintaining the unique characteristics of high dot gain often seen in flexographic printing.
Flexographic printing processes frequently produce a bump curve in the highlight area. By enabling Protect Highlights and Shadows, these curves can be retained, ensuring accurate reproduction of the intended print behavior.
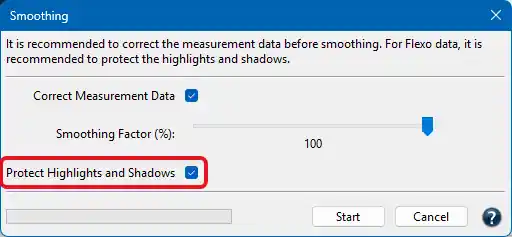
Note: When deciding whether to use the Protect Highlights and Shadows option, consider the type of printing system as well as the intended use of the characterization data and the profile created from it.
A very high dot gain or the loss of highlights may not be a mere temporary defect but a known characteristic of the printing process that will later be corrected on the plate (e.g., with special highlight “bump” curves in flexographic printing). In such a case, the highlights should be smoothed completely without protecting the highlights in anticipation of that later correction in the RIP. However, if no additional compensation correction is applied in the RIP, the characteristics of the highlights and shadows should be protected while applying smoothing.
Example of Smoothing with and without the Protect Highlights and Shadows option
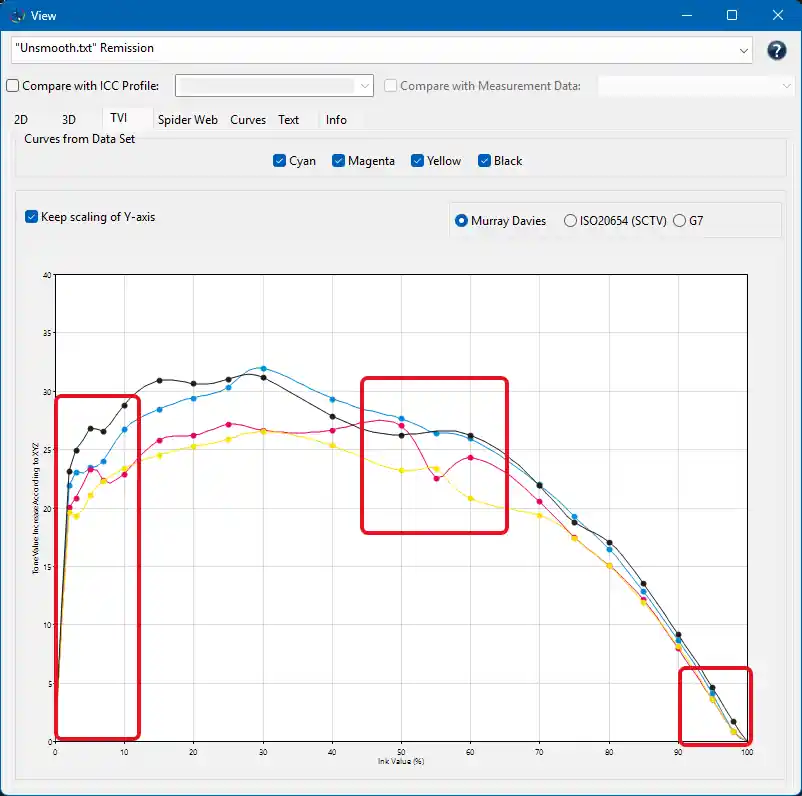
TVI view of the original data before smoothing: High and uneven dot gain in the highlights, bumpy curves in the midtones, and a K curve that differs from CMY in the shadow areas.
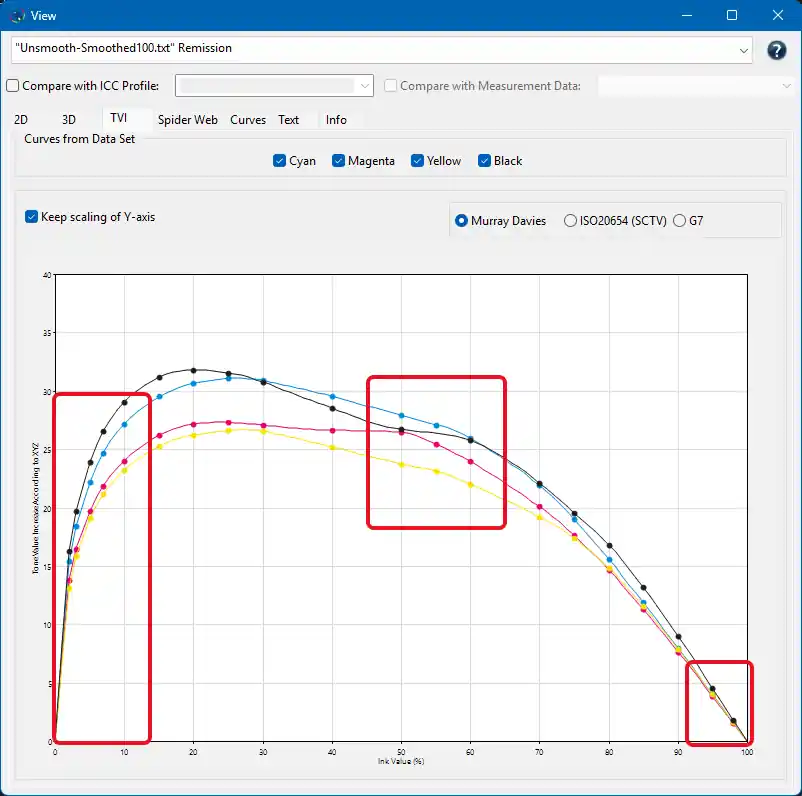
After smoothing without protecting the highlights and shadows: The curves are perfectly smoothed even in the highlights and shadows. However, the special characteristics of the highlights and shadows have been lost.
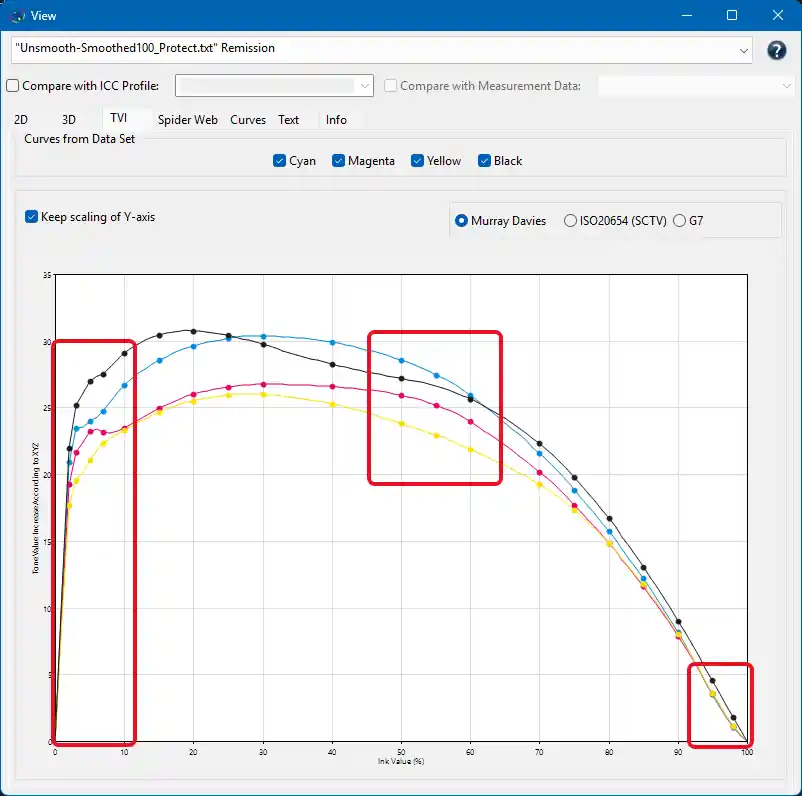
After smoothing with protection of highlights and shadows: The unevenness in the highlights has been removed and the curves are smooth overall, but the characteristics of the highlights and the ratio of the K curve to the CMY curves in the shadows have been preserved.