
Proofing
ZePrA’s sophisticated technology – e.g. the quality of DeviceLink and SmartLink profiles and the spot color rendering of its advanced spot color module – can be used for proofing as well. This is especially useful as many RIPs do not support CxF/X-4 data and SCTV calibration nor have a spectral color prediction model for spot color rendering.
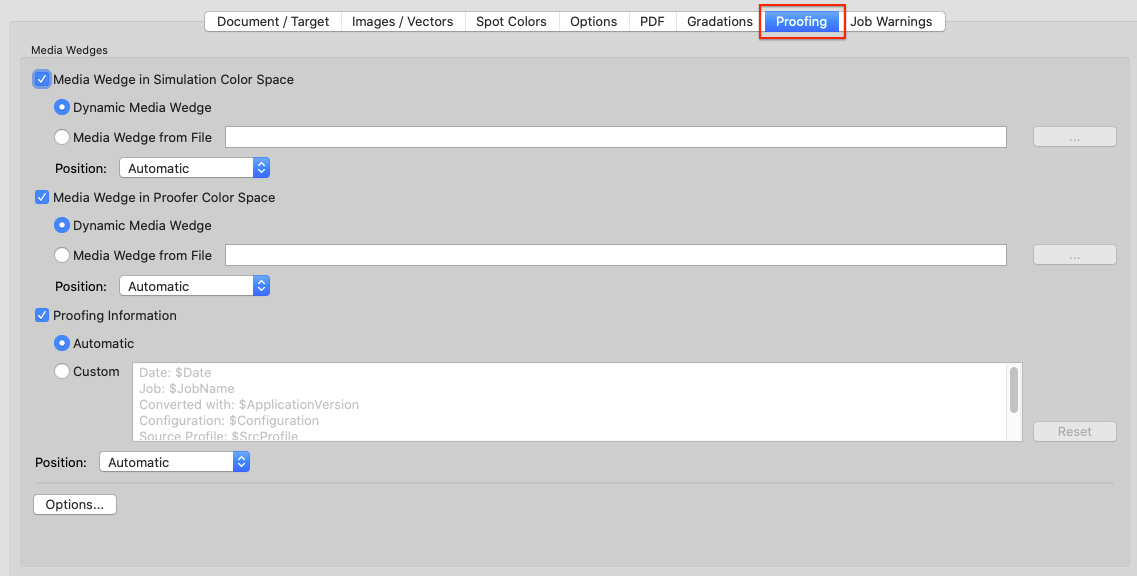
The Proofing tab under Configuration contains all Media wedge settings and the Proofing Information label.
Media Wedges
Two types of media wedges can be used:
- Media Wedge in Simulation Color Space: Can be used to determine the accuracy of the proof. This media wedge is converted based on the color management setting defined in the various configuration tabs.
- Media Wedge in Proofer Color Space: Allows using a second media wedge that is not color managed. It must be in the color space of the proofer and can be used to determine the stability of the proof printer.
Choose a Media Wedge.The media wedge is added outside the document’s media box to verify the proof. This can either be a dynamic or an external media wedge.
Dynamic Media Wedge: Uses the color space information of the simulation color space and dynamically adds all spot colors of the documents to be processed. The required reference files for measuring the wedges are created on-the-fly by ZePrA. They will be saved in the Folder for Report and other Data folder of the proofing queue that has automatically been set up by the Auto Setup Wizard.
Note: Currently, a maximum of 32 channels is supported for dynamic media wedges.
The reference files for dynamic media wedges contain both the device values (DCS values) and the target Lab values. The target Lab values are also calculated for the spot colors of the job and incorporated into the reference file in addition to the color values of the document color space. This is done according to the settings under Configurations > Options (solid tone only or gradation values as well) and Configurations > Spot Colors.
The measured values obtained can then be immediately compared to the target Lab values (e.g. in ColorAnt/Compare). Use these reference files in appropriate tools, such as ColorAnt’s Measure Tool, for measuring.
Note: Reference files are not created when the report folder Folder for Report and other Data is missing. If an existing queue is to be used for proofing, it must be verified that the folder for reports exists. If necessary, it must be created manually so that a reference file can be created. If this folder is missing, the reference file cannot be created.
Reference files are created for each job in the queue and named as follows:
Jobname_DynamicMediaWedgeReferenceSource
Jobname_DynamicMediaWedgeReferenceTarget
If dynamic media wedges are selected for source and target color spaces, two reference files for each job will be created.
Note: If the same job is run again, the reference file will be overwritten. This means that if the spot color patches are changed under Options, a modified reference file is saved, and any previous conversion with the reference file with a different number of patches is lost.
The use of spot colors for the dynamic media wedge can be defined under Options.
Media Wedge from File: Can be media wedges such as the FOGRA, UGRA, Idealliance* or other media wedges. For external media wedges, the corresponding reference file is required to measure the printed wedge. Measurements can be done with any proof evaluation software or with ColorAnt’s Measure Tool.
*The IDEAlliance ISO 12647-7 Control Wedge 2013 is included in ZePrA and available under /Users/Shared/ColorLogic/MediaWedges (Idealliance ISO 12647-7: 2013, 3-Row Digital Control Wedge ® is a registered trademark of the Idealliance).
Note: A separate ColorAnt license is required to use the measurement and comparison features.
Proofing Information: Enabling this checkbox will add text information which are in accordance with ISO 12647-7 such as information about the job, date and time, conversion settings and the software used. The information that will be added to the converted file can be verified and edited in the text field. For editing switch to Custom.
Frame: Adds a frame around the Proofing Information.
Logo: Inserts the logo specified in the Preferences into the Proofing Information.
Position: The two media wedges and the proofing information label can be positioned independently on the converted document. For each of these 3 elements, the user can specify where it should be placed. Positioning options are: Automatic, Bottom Margin, Right Margin, Top Margin, Left Margin. The elements are placed outside the media box of the document according to this setting. This results in an enlarged media box in the converted document. Automatic is suggested as default settings for all 3 elements to make sure that they are placed together on the converted job.
Options: General settings and settings for Dynamic Media Wedges can be defined under Options.
Media Wedge Options
General
Font Size: Defines the font size used for the proofing information label in points.
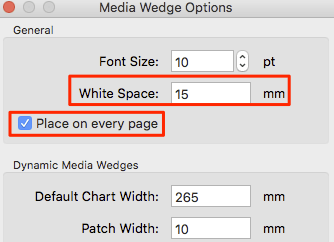
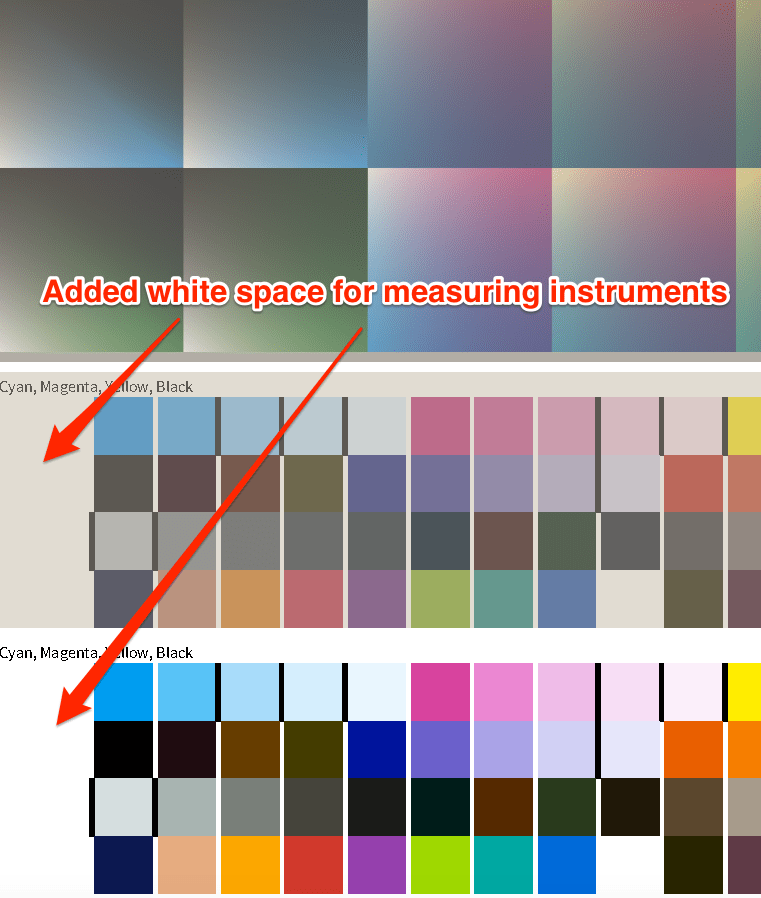
White Space: Allows the placement of margins on media wedges by entering a user-defined distance in mm. By default a white space of 15 mm is added. This ensures that enough white space is added on the left and right of the placed media wedges which some instruments need for correct measuring. The White Space margin applies both to external and dynamic media wedges.
Note: If the external media wedge already has a margin, we recommend entering 0 mm as White Space. As a rule of thumb the white space in millimeters for dynamic media wedges should be at least the size of the Patch Width. The white space of the Media Wedge in Simulation Color Space is color managed whereas the white space of the Media Wedge in Proofer Color Space is not.
Place on every page: For multi-page PDF files media wedges can be placed on each page. By disabling the checkbox media wedges will be placed on the first page of the PDF only.
Dynamic Media Wedges
Defines the Default Chart Width, the Patch Width and the Patch Height of the dynamic wedge.
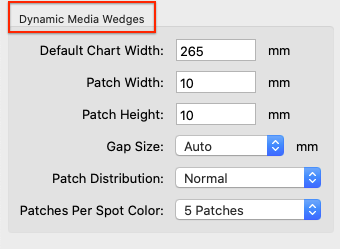
Gap Size: To separate individual patches. Select the width in mm.
Patch Distribution: Defines the distribution of patches on the media wedge.
- Randomize: Color patches are distributed randomly.
- Normal: Color patches are distributed as specified in the reference file.
- Sorted: Color patches are sorted from light to dark.
Patches per Spot Color: Defines whether spot colors are to be used in the dynamic media wedge and, if so, whether tints are to be used.
- None: No spot color is added to the dynamic wedge.
- Solid Tone: Only the solid tone of each spot color in the job is used in the dynamic wedge.
- 3 Patches: Uses the following patches for each spot color: 100%, 70%, 40%.
- 5 Patches: Uses the following patches for each spot color: 100%, 70%, 40%, 20%, 10%.
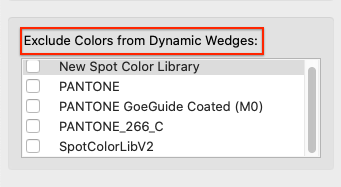
Exclude Colors from dynamic wedges: Spot colors are used in documents for various reasons besides printing purposes, e.g. to illustrate the DIE cut lines, or varnish, braille or other non printing elements. Obviously, those colors are not to be used in the dynamic media wedge. To avoid using them in media wedges, create a library (or more if needed) containing all spot colors to be excluded and select it (or them) from the list under Exclude Colors from dynamic wedges. This list contains all spot color libraries managed by ZePrA. Enable the checkboxes of only those libraries which contain the colors to be excluded.
The selected libraries containing the colors to be excluded are also applied to spot colors of external media wedges. Typically, if the Document Color Space is Multicolor, ZePrA assignes the channels of the Document Color Space to the channels of the media wedge. This is intended in most cases, e.g. if a 7C media wedge with generic channel names is used for a 7C Document Color Space in such a way that the channels are associated. However, this is not intended in case a spot color White is to be used as 5th channel and the 5th channel in the Multicolor profile of the Document Color Space is called Orange (for example). To retain the white spot colors an exclusion library which contains White as non-printing color can be selected.
Video Tutorial
How to Use the Proof Evaluation Tool in ColorAnt in combination with ZePrA
Learn step-by-step how to use the Proof Evaluation tool in ColorAnt for the evaluation of a proofing media wedge created with ZePrA. In this example, we will be demonstrating the special feature of ZePrA to create a dynamic media wedge using process and spot colors and how to use the supplied reference data from ZePrA for evaluation of a Contract Proof.